


Key Points to Remember
- You’re going to want to train for at least 12-16 weeks with a plan that’s specifically tailored to climbing Mount Kilimanjaro (that’s 5,895 metres) – and you’ll want to make sure it’s based on some solid science. Think progressive overload, specificity and the kind of endurance you’ll need to tackle those killer uphill sections. And for city dwellers, that usually means heading to the gym and using equipment like stairmasters and inclined treadmills to simulate what you’ll be doing in the mountains. You can also get creative and use urban infrastructure to your advantage – think climbing stairs or using whatever hills you can find to get a good workout. The best training for Kilimanjaro involves hiking on hills or uneven terrain, as this better prepares you for the mountain than training on flat terrain. Climbing stairs is an effective alternative for those without access to hills, as it simulates mountain climbing and strengthens the muscles needed for the trek. Training on hills or stairs is far superior to training on flat terrain, as it builds the stamina, muscle strength, and altitude adaptation required for summit night and mountain-specific movements.
- You should also be aiming to hit some pretty specific performance benchmarks. For a start, you’ll need to be able to carry a pack weighing 8-10 kg and hike for 5-7 hours a day on Saturday, 4-6 hours on Sunday, for 2 weeks before you set off. And yes, if you can do this outside, that’s even better. The thing is, if you’re not properly prepared for the climb, you might find that you don’t make it to the top – so getting this right is key.
- Now, heart-rate-based training is the way to go for building up your endurance – the idea is to spend about 70-80% of your time in what’s known as Zone 2 (that’s a conversational pace) – then throw in an interval session once a week to give your VO2 max a boost.
- Don’t forget to taper off your training a week or so before you set off – cut back on the volume by 40-60% and you should be feeling nice and refreshed by the time you arrive in Tanzania.
- And the good news is that this plan is designed to take account of the science behind altitude and VO2 max – as well as giving you some practical tests to see how you’re doing. Experts suggest training with a structured, progressive plan to optimize readiness for Kilimanjaro. This way, you can be confident that you’re really ready for the climb.
Understanding What Kilimanjaro Demands
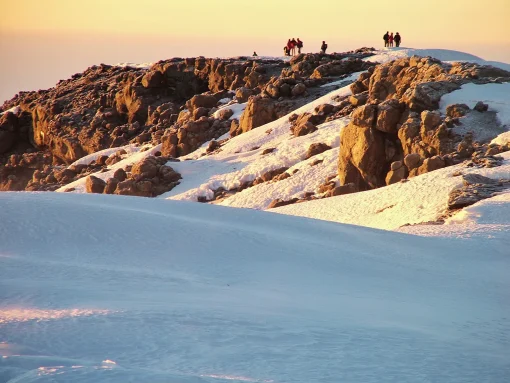
Climbing Mount Kilimanjaro via an 8-day Lemosho or Northern Circuit route is no easy feat – it takes a lot of training and a lot of determination to get to the top. The Kilimanjaro trek is a serious challenge that requires thorough preparation, both physically and mentally. And when you think about it, you’re basically spending 5-7 hours on your feet every day, trudging up 500-1,000 metres or so, through all sorts of different environments. And the night before you summit, you’ve got to climb another 1,000 metres and then hike all the way back down again.
So what are the key physical demands of climbing Kilimanjaro? Well to start with, you’ll find that there’s about half as much oxygen at the summit as there is at sea level. And that means your VO2 max is going to be severely impaired – we’re talking 40-50% reduced. And on top of all that, you’ve got to contend with altitude sickness, which can be nasty. Being in good physical condition is essential to handle the altitude and long days on the mountain. Regular physical activity, especially aerobic exercise, is crucial for building the endurance needed for the Kilimanjaro trek.
- The altitude at the summit is pretty extreme – about 50% less oxygen than at sea level
- Your VO2 max can fall by 40-50% at high altitude, which means even serious athletes feel pretty compromised
- There’s a higher risk of altitude sickness, which can be anything from mild to life-threatening
- What you’ll basically be doing all the time is hiking uphill and downhill with a heavy pack, for hours on end
The good news is that you don’t need technical climbing skills to climb Kilimanjaro – you’ll be able to stick to the standard routes without needing any ropes or crampons. But that doesn’t mean you can slack off on the training – what you need is to build up your endurance, your leg strength, and your mental toughness – because when the going gets tough, you’ll need to be able to keep going.
Most people should be expecting to spend 12-24 weeks training before they head out – and if you’re not a regular exerciser or you’re a bit older, you might want to plan on the longer end of that range.
The Underlying Science Behind a Good Kilimanjaro Plan
Mount Kilimanjaro training is a science-based approach to preparing both physically and mentally for the climb. A good Kilimanjaro training plan isn’t just some random assortment of gym sessions and the odd walk in the park – it’s all about science. And at the heart of it all are four evidence-based principles that will determine whether you reach the top or not.
Specificity means training in a way that actually simulates what you’ll be doing on the mountain – so if you live in a city, that means using the gym or finding urban hills to practice your hill climbing.
Progressive overload is about gradually pushing yourself harder – and research shows that you should be aiming to increase your weekly hiking time or elevation gain by 5-10% each week to get the best results. Any faster and you might end up with injury.
Recovery and supercompensation are where the real magic happens – and that means taking rest days when you need them (at least one per week), doing lighter recovery weeks every 3-4 weeks, and getting plenty of sleep (7-9 hours a night) so your muscles can build back up.
Individualization means customising your training plan to your own starting level – and that means taking a baseline fitness test to see where you’re at.

Heart Rate Zones, VO2 Max and Altitude
Now, when it comes to training, heart rate zones are the way to go – especially when you’re training at altitude. The idea is to use objective targets rather than just guessing how hard you’re working.
Here are three heart zones to get you started:
| Zone | Effort Level | Talk Test | Purpose |
|---|---|---|---|
| Zone 1 | Easy | Full sentences easily | Recovery, warm-up |
| Zone 2 | Endurance | Can talk, breathing deeper | Aerobic base building |
| Zone 3 | Hard | Short phrases only | VO₂ max improvement |
| To set approximate zones without lab testing, use 180 minus your age as a rough cap for aerobic training. Alternatively, perform a 20–30 minute field test (hiking uphill at maximum sustainable effort) to estimate your threshold heart rate. |
For training for Kilimanjaro, you should spend about 70-80% of your time in Zone 2. This is where the magic happens – a moderate intensity that lets you build up your aerobic base and your body’s ability to burn fat for fuel. Because, as we all know, when you go to a high altitude, your body’s ability to use oxygen gets smashed big time.
VO2 max – it’s the maximum amount of oxygen your body can process, and it’s a pretty big deal when it comes to high altitude. At sea level, a well-trained recreational athlete can have a VO2 max of 45-55 ml/kg/min. But at Kilimanjaro’s summit, that number plummets to around 25-30 ml/kg/min. The good news is that the stronger your aerobic fitness is at sea level, and the stronger your foundation is in Zone 2, the better you’ll be able to handle the altitude.
A key goal of training and acclimatization is to help your body adapt to the lower oxygen levels you’ll encounter at high altitude, making it easier to perform and recover as you ascend.
During the build-up phase, add one weekly interval training session in Zone 3. For example, try 4 x 4 minutes of hard hiking uphill, followed by 3 minutes easy recovery. This will help boost your cardiovascular endurance, and give you a bit of a zing that steady-state aerobic exercise can’t match.
12-16 Week Kilimanjaro Training Plan Structure
The training plan for Kilimanjaro is divided into three phases: Base (Weeks 1-4), Build (Weeks 5-10), and Peak & Taper (Weeks 11-12 or extended to Week 16 for those who are starting from scratch).
Base Phase (Weeks 1-4)
- 3-4 days per week of 30-60 minutes of aerobic training in Zone 2, using gym equipment like stairmasters, inclined treadmills or going for a walk when the weather lets you
- 1-2 days of strength training focused on your lower body
- 1-2 shorter training hikes or stair workouts to get you up and down (just don’t expect too much elevation gain – 200-400m is plenty for now)
- Start off on flat ground, getting your joints ready for the harder stuff to come. You can use gym machines or climb the stairs in an apartment building to get the feel of it.
Build Phase (Weeks 5-10)
- 4-6 training days a week – you’re stepping it up a bit now
- Long hikes or stair sessions building up from 3 to 6 hours, with 500-1000m of ascent (yeah, it’s a lot)\
- One interval session a week to keep your VO2 max in check
- Gradually add weight to your pack over time, aiming for 8-10kg by week 10
- You want to get your total weekly vertical gain up to 2,000m or more – so get ready to put in the work!
Peak Phase (Weeks 11-12 or 11-16)
- You’re getting ready for the big time now – simulate the conditions you’ll find on Kilimanjaro by doing back-to-back longer hikes or stair workouts
- Saturday: 5-7 hours with 800-1,000m of ascent
- Sunday: 4-6 hours with similar terrain or stair training – don’t get too worn out!
- Keep your strength work up, but cut back a bit on the gym training
Taper (Last 7 Days)
- Cut back on your training volume by 40-60% – you’re getting close to the finish line
- Keep in some short easy hikes or stair sessions to keep the movement patterns going
- Light strength maintenance only
- Focus on getting plenty of rest, staying hydrated, and making sure you’re not about to fall apart when you get to the mountain. Staying injury free in this final week is crucial for optimal performance on the climb.
A simple weekly schedule during the build-up phase might look something like this: Monday strength training, Tuesday Zone 2 cardio (stairmaster or treadmill), Wednesday hill/stair session, Thursday rest, Friday easy hike or stair workout, Saturday long hike or stair session, Sunday moderate hike or stair session.
Trekking-Specific Conditioning: Uphill and Downhill
There’s no substitute for hiking uphill and downhill with a heavy pack. Mountain-specific training means hiking uphill, ideally with a weighted pack, to mimic the conditions on Kilimanjaro. If you live in a city, you can simulate this by using a gym stairmaster or inclined treadmill, or finding a tall building to climb with a weighted backpack.
Progression Protocol:
- Weeks 1-4: 60-90 minute stairmaster or treadmill sessions 1-2 times a week. If you can get outdoors, do a short hike or two to keep things interesting.
- Weeks 5-8: Build up to 3-4 hour stair or hike sessions with 500-700m of ascent equivalent.
- Weeks 9-12: Extend to 5-6 hour sessions with 1,000m of elevation gain equivalent.
- Final weeks: Do back-to-back training hikes or stair sessions to simulate the climb days.
For pack weight, start with 3-4kg and add weight gradually, no more than 1kg per week, until you’re carrying 6-10kg. That’s a good weight to simulate the summit day pack.
Downhill conditioning is just as important. Make sure to include long descent sections or stair descents to prepare your quads for the 2,000-2,800m of descent from the top. Studies show that 40% of descent injuries come from inadequate training – don’t be that person.
Alternatives When Hills Are Unavailable:
Not everyone lives near a mountain, and that’s okay. Here are some alternatives:
- Stairmaster at the gym: 45-90 minutes of steady climbing with your pack on
- Tall building stairwells: 60+ minutes of continuous step-ups to get your legs ready for the climb. Climbing stairs is an effective way to replicate uphill hiking when hills aren’t available.
- Inclined treadmill: 10-15% grade for 60-90 minutes with your pack weighing you down
- Tackling outdoor stadium stairs in comfy hiking boots – multiple circuits to get those legs moving
Test your summit-night pacing by keeping a steady “can chat” pace for 200-250 vertical meters per hour. Go for a “pole pole” approach – that’s Swahili for taking it easy – to mimic the rhythm of the actual Kilimanjaro climb.

Strength and Mobility Training for Kilimanjaro
While nothing beats the real thing when it comes to training for Kilimanjaro, incorporating strength training into your routine two days a week will make a big difference – it’ll improve your efficiency, protect your joints, and help you power through the steep bits and the brutal descent.
Lower Body Exercises (2-3 sets, 8-12 reps each):
- Squats – barbell, goblet, or body weight – whatever gets the job done
- Walking lunges
- Step-ups onto a 30-40cm box
- Romanian deadlifts
- Calf raises – single leg for an extra challenge
Core and Upper Body:
- Hold steady in a plank (front & side, 30-60 seconds) – your core will thank you
- Dead bugs for keeping your core stable
- Rows using free weights or cable – you’ll be pulling for the summit
- Shoulder work – light stuff to help you wield those trekking poles like a pro
In the gym, focus on moderate loads – 70-80% of your max – and on controlled tempo. We’re building strength endurance here, not raw power. That way you’ll be ready for the long haul, not just some fancy footwork.
After each session, spend 5-10 minutes stretching your calves, hamstrings, hip flexors, glutes, and lower back. And once you’re clocking in over 8-10 hours a week, add a dedicated recovery session (yoga or stretching) to keep those joints loose and prevent injuries.
If you’re new to weight training, a personal trainer with experience working with endurance athletes can help you refine your technique and get the most out of your training.
Climbing Techniques for Kilimanjaro
Climbing Mount Kilimanjaro isn’t just about putting one foot in front of the other—it’s about moving smart, conserving energy, and using the right techniques to tackle the mountain’s challenging terrain. As you work through your training plan, make sure you’re not only building your fitness level with strength training, interval training, and aerobic exercise, but also practicing the specific skills you’ll need on the mountain.
One of the best ways to prepare for the steep inclines and rough terrain of Kilimanjaro is to master the use of trekking poles. These are more than just accessories—they help distribute your weight, protect your knees on the descents, and give you extra stability on loose or rocky ground. Practice using them during your training hikes so they become second nature by the time you hit the trail.
Your hiking boots are another critical piece of the puzzle. Spend plenty of time breaking them in on varied terrain, and get used to moving efficiently over rocks, mud, and scree. Try different lacing techniques to find what works best for your feet, and don’t forget to practice with a loaded day pack to simulate summit day conditions.
When it comes to climbing techniques, focus on taking small, steady steps—especially on the steeper sections. This “pole pole” (slowly, slowly) approach is the secret to conserving energy and maintaining your cardiovascular endurance over long days. Use your leg strength to power up the hills, and keep your core engaged to stay balanced on uneven ground.
Finally, mental stamina is just as important as physical strength. Training for Kilimanjaro means pushing through fatigue, staying focused on your breathing, and keeping a positive attitude even when the going gets tough. By combining smart training with solid climbing techniques, you’ll be well-prepared to handle whatever the mountain throws your way.
Altitude, Acclimatization, Altitude Sickness, and Pre-Trip Testing
Let’s face it: no amount of training at sea level can fully prepare you for the oxygen-starved conditions at 50% less air pressure. But, you know, being in decent shape and having a smart acclimatization plan really does improve your chances of reaching the summit.
Route Selection Matters:
- Itineraries lasting 7-9 days (Lemosho, Northern Circuit) get you 65-85% of the way to the top
- Those super-short 5-6 day routes (ahem, Marangu) will only get you about 45% success
- Longer routes give you time to acclimatize – “climb high, sleep low” is your new mantra
If you can swing it, spend a few days at 2,000-3,000m on a practice hike within 2-8 weeks of your departure. The Alps, Rockies, or Drakensberg offer some great opportunities to get a feel for mild altitude symptoms in a controlled environment.
You might’ve heard of all sorts of fancy tools to help you acclimatize – altitude tents, intermittent hypoxic training. They exist, yeah, but they’re expensive, not essential, and best used under specialist guidance. They can help your body get used to high-altitude conditions by duplicating reduced oxygen levels, especially during sleep, which is super helpful. But research shows they work best when used in conjunction with actual hiking rather than replacing it altogether.
Readiness Test (3-4 Weeks Before Departure):
So here’s what we’re looking for: if you can cram in two decent hikes with 1,000m or so of ascent carrying a 6-8kg pack back to back, and still feel relatively okay the next day, then you’re ready for Kilimanjaro. Doing less – or going much slower – suggests you might need to extend your training, adjust your expectations, or take a longer route to get the acclimatization you need.
Gear and Equipment Essentials for Kilimanjaro
Training for Kilimanjaro is as much about getting your gear right as it is about being in good nick. Your training plan should include not just physical conditioning but also careful selection and testing of the right equipment. First things first: get yourself a top-notch pair of hiking boots – these are the foundation of your whole Kilimanjaro adventure. Make sure they’re waterproof, supportive, and properly broken in before you even start your training hikes so you don’t wake up with blisters on the mountain.
Trekking poles are another must-have – they’ll give you the stability and knee-saving comfort you need on both the ups and downs. Practice using them so it’s second nature by the time the real thing comes around. Day packs need to be comfy, adjustable, and big enough for all the essentials – water, snacks, extra layers and rain gear, for example. As you get further into your Kilimanjaro training, gradually add some weight to your pack to mimic the conditions on summit day. Layering is super important when tackling the unpredictable weather on Mount Kilimanjaro. Make sure to invest in some decent gear – moisture-wicking base layers, warm mid-layers, and a good quality, weatherproof outer shell that’ll withstand the elements. Don’t forget some of the simpler but just as vital bits like a warm hat, pair of gloves and some sunglasses to shield you from wind and sun. Try out all the gear on your longer training hikes to make sure it’s all fit for purpose and comfy enough. It’s especially important to train in the same clothing and gear you plan to use when reaching Kilimanjaro’s summit, so you know everything will be comfortable and effective in the toughest conditions.
By putting a high priority on getting the right gear and equipment sorted in your Kilimanjaro training plan, you can focus on the serious physical and mental challenges of the climb, confident that you’ve got your back covered.
Safety Precautions on the Mountain
Safety should always be your top priority when climbing Mount Kilimanjaro. The mountain’s high altitude and unpredictable weather can pose serious risks, so it’s essential to be prepared and vigilant every step of the way.
Altitude sickness is one of the biggest challenges you’ll face on Mount Kilimanjaro. Symptoms like headaches, nausea, dizziness, and fatigue can strike anyone, regardless of fitness level. The best way to reduce your risk is to choose a route that allows for gradual ascent and proper acclimatization. Listen to your body, communicate any symptoms to your guide, and never be afraid to slow down or take an extra rest day if needed.
Weather conditions on Kilimanjaro can change rapidly, with everything from blazing sun to freezing winds and sudden snowstorms. Always pack and wear appropriate gear, including warm layers, waterproof clothing, gloves, and a hat. Carry a well-stocked first aid kit and know how to use it—minor injuries can quickly become major issues in a remote environment.
Climbing with a reputable guide or tour operator is non-negotiable. Experienced guides are trained to spot early signs of altitude sickness, manage emergencies, and make critical decisions about when to push on or turn back. They’ll also ensure you follow established safety protocols, from proper hydration and nutrition to safe pacing and group management.
By respecting the mountain and prioritizing safety, you’ll give yourself the best possible chance of a successful—and safe—summit of Mount Kilimanjaro.
Mental Preparation for the Climb
Physical fitness only gets you half way when it comes to tackling Mount Kilimanjaro – mental resilience is just as important. A solid Kilimanjaro training plan should involve some strategies for building resilience, focus and a positive attitude. Start by being realistic about what you’re capable of and adopt a ‘growth mindset’ – it’s all about progress, not perfection after all. Try visualising yourself reaching the summit and overcoming obstacles – this sort of mental rehearsal can really give you a confidence boost and keep you motivated.
Its totally normal to feel a bit stressed or anxious when you’re tackling something as big as a Kilimanjaro climb – but you’ve got some tools to help you manage those nerves and stay calm under pressure. Incorporate some relaxation techniques like deep breathing, meditation or yoga into your training routine and remember that setbacks are a normal part of the process – don’t let them get you down.
Remind yourself why you’re doing this trip – the people you’ve got with you and the amazing experience you’ll have at the end of it will all help keep you going even when the going gets tough. By balancing mental preparation with your physical training, you’ll build the determination and resilience you need to see the climb through to the end.
Training with a Partner or Group
Training for a Kilimanjaro climb is way more fun and effective when you’ve got a mate or a group of like-minded people to train with. Bringing group sessions into your Kilimanjaro training plan can provide that extra motivation, accountability and support that’ll keep you going on those tough days. Plus, you’ll learn heaps from each other and be able to share tips and celebrate your progress together.
Group training is great for building teamwork and communication skills – and those are skills that are invaluable on a mountain like Kilimanjaro where you’ll be counting on your team mates for support and encouragement. Whether you’re doing long hikes, interval sessions or strength workouts, having a training buddy will help keep you engaged and motivated.
If you don’t have a training partner, why not join a local hiking club or connect with others who are training for a Kilimanjaro climb online? The camaraderie and shared purpose will keep you on track and make the whole experience more enjoyable.
Multi-Day Climb Preparation
A successful Kilimanjaro climb is all about endurance, both physical and mental. Preparing for a multi-day trek means more than just being able to hike for a few hours—it’s about building the stamina to keep going, day after day, in challenging conditions.
Start your training program at least 2-3 months before your scheduled climb. Focus on a balanced mix of aerobic exercise, strength training, and interval training to build the endurance and muscle power Kilimanjaro requires. Gradually increase your elevation gain, hike duration, and pack weight to mimic the demands of the mountain. Training hikes with a loaded day pack are essential for getting your body used to carrying everything you’ll need on the trail.
Don’t overlook the mental side of preparation. Multi-day climbs test your resilience, so practice staying positive and focused even when you’re tired or uncomfortable. Simulate back-to-back long hikes on weekends to get a feel for sustained effort and recovery.
Logistics are another key part of multi-day climb preparation. Research your route, plan your travel and accommodations, and make sure you have a system for organizing your gear and food. The more you can practice and prepare in advance, the smoother your Kilimanjaro experience will be—leaving you free to focus on the climb itself.
Common Mistakes to Avoid
Even the most determined climbers can fall into common traps when training for Kilimanjaro. Avoiding these mistakes can make the difference between reaching the summit and having to turn back.
One of the biggest errors is not giving yourself enough time to train. A rushed training plan won’t build the endurance and strength you need for the high altitude and challenging terrain of Mount Kilimanjaro. Start training at least 2-3 months before your scheduled climb, and stick to a structured plan that gradually increases intensity and duration.
Another frequent mistake is neglecting acclimatization. Climbing too quickly or skipping rest days can dramatically increase your risk of altitude sickness, which can end your climb early. Always choose a route and itinerary that allow for gradual ascent and proper adjustment to the thin air.
Overtraining is another pitfall—pushing too hard, too fast can lead to injury and burnout. Listen to your body, schedule regular rest days, and don’t ignore warning signs like persistent pain or fatigue.
Finally, don’t underestimate the mountain. Kilimanjaro’s steep inclines, rough terrain, and unpredictable weather demand respect and serious preparation. By following a well-structured training plan, starting early, and being honest about your fitness level, you’ll set yourself up for a safe and successful climb to the Roof of Africa.
Final Preparations Before Departure
As your Kilimanjaro climb gets closer you’ll be fine-tuning everything and making sure everything is in place. Go through your Kilimanjaro training plan one last time and double-check that you’ve done all the key workouts – that’s the longest hikes and back-to-back sessions. Test all your gear one last time to make sure everything fits and functions as it should – no point rushing out to buy anything new at the last minute. Remember, the final day of the Kilimanjaro climb is often the most challenging, and being fully prepared can make the difference between reaching the summit and turning back.
Get all your essential documents in order, like your passport, travel insurance and any medical certificates you need to bring. Go over your itinerary and double-check all your travel arrangements, from airport transfers to accommodation. If you’re travelling with a group, make sure everyone knows the meeting points and emergency contacts.
In the last few days before you leave, focus on resting, eating well and staying hydrated. Avoid any last-minute changes to your training or diet and make sure you get plenty of sleep so you’re feeling strong and refreshed when you arrive in Tanzania. By getting all this right, you’ll be set for a safe and successful Kilimanjaro climb – ready to put all your hard work to the ultimate test.
Sample Week: Putting It All Together
This week is an example of a ‘Build Phase’ for someone 10 weeks away from an 8-day Kilimanjaro hike via the Lemosho route. A key milestone in your training is achieving comfortable hiking on consecutive days with a loaded pack and significant elevation gain, as this simulates the demands of the actual climb.
| Day | Session | Duration | Details |
|---|---|---|---|
| Monday | Strength + Mobility | 45–60 min | Lower body and core exercises, 10 min stretching |
| Tuesday | Zone 2 Cardio | 45–60 min | Stair master or inclined treadmill, optionally with light pack |
| Wednesday | Hill/Stair Session | 60 min | Continuous uphill work, 400–600 m vertical, moderate pack |
| Thursday | Rest | — | Gentle walk, easy cycling, or yoga; focus on recovery |
| Friday | Moderate Hike or Stair Workout | 2–3 hours | Varied uneven ground or stair climbing, 300–500 m ascent, near-target pack |
| Saturday | Long Hike or Stair Session | 4–6 hours | 700–1,000 m ascent/descent, full Kilimanjaro gear |
| Sunday | Easy Hike or Rest | 1–2 hours or off | Listen to your body; track soreness |
| This exercise regime totals approximately 10–12 hours across the week. Adjust based on your fitness level, recovery capacity, and schedule constraints. |
Recovery, Nutrition and Health Considerations
The real work on this regimen happens between the workouts, not when you’re actually doing them. You’ll need to make sure you’re getting some serious recovery going on, including nutrition, health checks and all the rest alongside the physical training itself.
Sleep
- Aim for 7-9 hours a night, especially when you’re pushing it hard during heavy training weeks
- Sort out work and travel to make sure you get enough sleep in the last month before you go
- And don’t even think about getting too little sleep – that can send your cortisol levels through the roof, and that’s just going to make it harder to adapt and recover
Nutrition
- Get enough carbs to top up those glycogen stores after a long hike
- You’re going to want to be looking at around 1.6-2.0g/kg of protein a day to help with muscle repair
- And don’t forget to include some healthy fats in the mix – they’re good for hormone production and keeping you full up
Hydration and Fueling
- Keep an eye on your urine – if it’s pale yellow then you’re good to go
- If you’re planning on doing a long hike in the summer, try using some electrolytes to stay topped up
- Get in the habit of eating snacks every 60-90 minutes on long hikes – don’t try something new on a summit attempt!
Medical Clearance
If you’ve got any pre-existing health conditions – heart, lung or metabolic issues, for example – or you’re over 50 and haven’t been active for a while, get a medical check at least 3 months before you go. No amount of positive thinking is going to make up for serious health issues when you’re at high altitude.
Keep a simple training log and track your sessions, sleep quality, resting heart rate and any injuries you pick up along the way. That way you can spot overtraining early on and make some adjustments before it’s too late – you want to make sure you can reach the summit of Kilimanjaro. Maintaining good health and recovery practices is essential to ensure you are able to summit Kilimanjaro successfully.
Steve House, a top alpinist, reckons that elite mountain athletes train with less intensity but more consistency than most people think. Building up your endurance takes patience, not just a lot of hard effort.
FAQ
How early should I book my Kilimanjaro climb to fit in with this training plan?
If you’re pretty fit and already exercise regularly then book 4-6 months in advance – if you’re a bit more laid back and don’t get much exercise then you’ll want to think about booking 8-12 months ahead. That way you can get a good base level of fitness going, complete a 12-16 week training program and still have some buffer time in case you get delayed by illness or something.
Do I have to run to be able to summit, or can I just stick to walking and hiking?
You don’t need to run to get to the top – lots of people make it to Uhuru Peak without ever putting in any running training, instead doing brisk walks, hiking uphill and stair work at Zone 2. But if you enjoy running and you’re not putting too much strain on your joints, then 1-2 easy runs a week can be a good way to build up your cardiovascular fitness.
How many hours a week should I expect to be training at the peak of my training?
During the 3-4 heaviest weeks of training, you’re looking at around 8-12 hours per week in training time – a lot of that will fall on the weekends, with long training hikes and shorter gym or cardio sessions during the week. Adjust to suit your own fitness levels, of course.
What if I live at sea level and can’t get to any mountains before the trip? If you’re planning to climb Mount Kilimanjaro but reside at sea level, there are still effective ways to prepare for the altitude challenge.
Don’t worry, it’s not the end of the world – you can still get in shape even if you’re in a flat city. Use a stairwell, a stairmaster machine or an incline treadmill with a weighted pack to build up your endurance, and try to get in some longer, slow climbs. You can’t fully acclimatize to high altitude at sea level, but strong sea-level fitness and an 8-9 day route can make up for it.
What if I develop knee or back pain while I’m training?
As soon as you get any kind of pain, cut back the intensity and change to a lower-impact activity like cycling or the elliptical. Reduce your pack weight and take it easy for a bit, and add in some extra mobility work and targeted strengthening exercises. If the pain persists, get a sports physio in to take a look.
For more info on summit prep and aerobic training, check out our latest blog post.


